Saturday, August 31, 2013

How To Clean Gunk Off Of Hair Straightener Plates


Ladies, I'm sure that you can all relate to looking down at your hair iron and seeing some weird kind of gunk and funk all over the two plates. You probably just assume that it's normal wear and tear, and burn marks from the extreme heat of your hair iron. However, little did you know, all that gunk and funk is actually built up and needs to be taken off of your hair iron plates... Like yesterday. It's hair products that have been burned onto it, dry skin particles and all kinds of things that you probably don't even want to think about. In fact, don't think about it - Just clean it. Before you go and grab soap and water, there are some things that you should know to ensure that you're properly cleaning your hair iron plates. Don't worry. It's fast, and simple!

Step One: You can purchase a hair straightener cleaner, or you can use rubbing alcohol and get the same results.Once you are absolutely sure that your iron is completely cooled down,  spritz the cleaner onto the ceramic blades of your hair straightener and allow the liquid to soak into the gunk that has built up on the ceramic blades. This will begin breaking it up so it's easier to remove.

Step Two: Wipe the blades clean with a paper towel or cloth. If you are eager to get in between the tiny crevices, use a cotton swab, tooth pick or Q-tip to get in the hard-to-reach places.

Step Three: After the majority of the gunk is removed, you may still see the stains on your ceramic hair straightener blades that are anything but attractive. This is when a little more tedious cleaning needs to come into play. Continue to spritz the cleaner onto the blades as you allow the gunk to break up more and more. Wipe off what you can and continue as needed. You can always use an old tooth brush and with circular motions, you can scrub your ceramic blades without doing damage. Be sure to use a soft bristle tooth brush and lightly brush it as you do not want to put any nicks into the blades as these can tug on your hair and create split ends.

If you still notice gunk build up after several repeats of allowing the cleaner to soak in, and brushing with a toothbrush, you can go to the extreme and use a steel wool pad that you may even have under your kitchen sink. However, it is absolutely imperative that you brush the blades very carefully with this pad and constantly check for scratches and nicks. If you are doing damage to the blades, discontinue this method immediately or proceed much lighter than what you were.

In order to deter this problem from occurring moving forward, decrease the amount of product that you use prior to using your hair straightener. However, this isn't always easy or realistic as heat protection products are highly recommended and hair spray often comes into play with any hair straightening style. At least now you know how to clean the plates effectively and efficiently.

Photo Credit: http://www.wikihow.com/Clean-a-Hair-Straightener

Friday, August 30, 2013

Necklaces


               Hello ladies. I hope you all had a good and steady week and that you got all the things you needed to get done, done. For today’s blog I was to discuss necklaces. Jewelry always makes a statement; it’s like the cherry on top of your ice cream or the frosting on a cake. However a necklace is far more noticeable than any other jewelry. So, let’s take a look at the different kind of necklaces you can owe.

The classic: Okay, I’m almost 100% certain we all have the classic thing chain necklace that carries a small or medium pendant. I’m I right? Anyways, these necklaces are very feminine and they always look beautiful with a pretty low  dress or tube dress or shirt. If you want to keep it simple and elegant, you can never go wrong with the classic.

Neck Tight: Okay, we don’t see many of these types of necklaces very often. Perhaps it’s because a lot of people don’t think they will be able to pull it off, or because they always associate them with beach type of necklaces. Well ladies, let me tell you that there are some very pretty necklaces that are neck tight and look very pretty. I personally have one of the magnetic ones, and I love it. These types of necklaces look best with clothing that show off your collar bone. Some of these necklaces are thin and just hug your neck. I personally like the ones that have a pendant in the middle or some other type of design all around.

The chains: I don’t know if you ladies have noticed but in the last few years long chain necklaces have become a major fashion statement. They look wonderful if you wear them with plain tops or plain dresses, and it doesn't matter if your dress or top is strapless or turtle neck; the chains always look awesome.  They add more personality to your outfit. The nice thing about these chains is that they come in different styles; some of them even have watches embedded on  them.

                Okay friends, there you have today’s blog discussion on necklaces. Remember it’s just a matter of plain around with your jewelry and seeing what works. Not all pieces of jewelry are the same; some will look great with certain types of clothing while other will not. 

Photo Citation: Way2Blogging. Diamond Necklace Design For Women. wallpapers. 30 August 2013

Thursday, August 29, 2013

Avoid Becoming a Fashion Faux Pas (Avoiding A Miley)

I'm sure that many of you have seen the 2013 VMAs. If not, go ahead and youtube or do a quick search for the highlights of this year's show. I'll wait.


What I'd like to focus on is avoiding fashion faux pas. What better way than to learn from those constantly in the spotlight? This is in no way mean spirited. It's a good natured chuckle. We've all tried different fashions throughout our years that we now reflect on and wonder why we ever wore that one outfit or tried out that haircut. Yes, trying something new and experimenting is always fun, but in the process, we receive great and humorous memories. Scroll below for some fun and take a stroll down memory lane over the past few decade's of celebrity fashion faux pas.


2013 Miley Cyrus VMAs 2013 Performance


While we may cringe a little at Miley's overall look, growing up is hard. Think of the phases we all went and go through during our preteens, throughout high school and continuing into adulthood. We were extremely lucky to grow up in peace and without cameras capturing each awkward phase. But still, two pom poms adorning the head, nude under garments, and a foam finger abused in ways it shouldn't.... too funny. 


Lesson here: maybe try only one 
new thing at a time? Don't try too hard? But most importantly, have fun. Have you ever seen anyone more happy with themselves? She looks like she is having fun. While we may cringe, she's getting the last laugh and the fun memories.


Poof the Powder Goes


Too much powder and not enough blending. Ever been caught like this on camera? I hear you. Your stomach turns and you can't help but smack palm to head. 


Lesson here: Blend, blend, blend! And make sure to blend some more! And don't forget that its always smart to start with less and build as you need it.


Stylin'


Remember that one hairstyle you had? Or did you try a hair fad that went away as quickly as it got popular? In middle school, I did the whole slick back ponytail with two random strings of hair that fell over the face. Greasy much? 

Lesson here: ... Enjoy the good memories :)


Going Under The Knife??


I've always been a big advocate for natural beauty. I believe that every person is naturally beautiful and it just takes time, self confidence, and experience to really feel beautiful in your own skin. However, those who need a little boost, good for you. Be beautiful but know you already are.

Lesson here: If do decide to undergo surgery...Don't choose cheap and don't go overboard. Finally, know that you are beautiful without it.


Do you have any memories that are just too funny? Share below!


Monday, August 26, 2013

Damaged Hair


        Hello ladies, I hope you all got to enjoy your weekend with your loved ones. For today's blog I would like to discuss tips on how to nurture the hair back to health. Let's take a look
 
How bad is it? I recently decided that enough is enough. My hair was damaged and trimming it wasn't going to help, I needed a haircut. Sometimes trims really make a difference, other times, one must realize that the hair has to go because a trim won't help. Not even styling helps because the hair still looks dry, damaged, and just ugly. Take it from me, my hair had taken forever to grow and I didn't want to cut it, but honestly it wasn't nice anymore, I hated it. So I decided to cut it, best decision I could make, I don't have a single split end! What girl doesn't love that?
 
Hair Products: After cutting your hair you should buy products that prevent dryness and split ends, you may also want to buy heat protectant. In doing this you can guarantee your hair will grow healthy and strong. If you don't cut it and just expect your damage hair to disappear after using treatment for split ends, don't have high hopes. It will help a little, but there is no way the split end will disappear. The only cure for split ends is to cut them. But do not worry, it's just hair and it will grow back.
 
Wash and condition: Try to avoid shampoos that have sulphate in them, they play a role in damaging your hair. Also, don't wash your hair so often sometimes that causes damages too. Try to wash it every second day or so. Another thing you want to do is deep condition your hair once or twice a month. Believe it or not, conditioner plays a huge role in how your hair feels and functions, if you don't believe me, avoid conditioner next time you wash your hair. I can guarantee it will be a complete mess. Always keep in mind it's important to deep condition, especially during the winter months when the hair loses it shine and moisture.
 
      Okay, there you have it ladies. I hope you all have a love Monday night. Remember the hair is one of the best futures a girl can have, so you always want it to look healthy, shiny, and beautiful.


Photo Citation:The Damaged Hair Diaries: Part I. jadabeauty. 27 December 2012. 26 August 2013 

Saturday, August 24, 2013

The Best Curling Irons For Your Length


If only life was as easy as having one hair iron that provided all styles for all lengths of hair. Unfortunately, it's not that simple and in order to achieve the ideal looks for your style, you need to pick a curling iron that was designed specifically for the length of your hair. For example, a 2 inch barrel curling iron is certain to not provide the tight ringlets you desire for your sexy boy cut, nor will that curling iron provide tight ringlets at all - Regardless of how short or long your strands are. Here are the appropriate curling irons that have been recommended for certain lengths to ensure that you get the hair style you're trying to achieve.

Short Hair Curling Irons
For short hair, you truly want to stick with the smaller barrels to ensure that your hair can wrap around it perfectly to provide the curl or wave that you desire. A 3/4" barrel is ideal for curls in short hair, and a 1" barrel is perfect for creating beachy waves.

Medium Length Hair Curling Irons
When it comes to hair that is medium length, or shoulder hair length, you want to stick with a smaller barrel as well. Again, you aren't working with much hair and you need to be sure that the strands will wrap around the curling iron fully. For a curly look, stick with 1" barrels, and when trying to achieve a wavy hairstyle, use a curling iron that has a 1 1/4" barrel.

Long Hair Curling Irons
The longer the hair, the more options you typically have for all kinds of hair irons, and that includes curling irons. However, if you are trying to get flawless curls, a 1 1/4" barrel curling iron is best for your length, and for a wavy look, 1 1/2" barrel is best.

Now remember ladies. These are just guidelines and you should always experiment with different curling irons and wands to find one that fits, not only your hair length, but also one that works well with you. However, these are the ultimate curling iron barrels that have been proven to work best on these hair lengths and when you're in a rush for a new curling iron or a fresh and sexy flawless look, these are definitely the ones that you should consider when trial and error isn't an option.

As a bonus tip, remember to always use a heat protection product prior to placing any heat on your strands. This will deter damage done to your hair and products such as KQC Heat Protectant Shine Spray have additional elements to help your hair look even more flawless. In addition, there are some heat protection products that help hold curls, while others encourage sleek strands. Whatever product you choose, be sure to never forget to use it. Irons, both straighteners and curling irons put a lot of sizzle to your style, and without a heat protection product, you may be unhappy with the final results... Damaged strands!

Photo Credit: http://www.fanpop.com/clubs/the-beauty-shop/articles/6227/title/how-curl-hair-using-curling-iron-germany123

Friday, August 23, 2013

Modern Hair Dyes


      Hello ladies, I hope you are all doing well.  For today's blog I would like to discuss hair dye. But not just any hair dye, I want to talk colors! So let's take a look at some of these modern hair alternatives.
 
Full Head Dye: Okay, if you ever want to have a drastic look, dye your hair and pick a very noticeable color. If you're very light skin and have light eyebrows a light purple would look amazing. I saw this girl the other day and she was rocking purple hair, it looked very pretty! If you on the other hand have darker eyebrows and a darker skin tone try a red dye, it's sure to look amazing. Don't be afraid to try on a new look. If you on the other hand want to try something new but don't want it to be so drastic, do not worry, there are more things you can do.
 
The Tips: If you would like to add some POW to your hair without dying your entire head, that's totally cool. Dye the tips of your hair! With this type of look you can rock almost any color because it's just the ends. You of course would have to bleach it first and then dye it. Since this is the case I recommend you buy a special cream that will help soothe your hair, so it doesn't get damaged. Thankfully you only have to bleach it once for the color to sit. On other hand you don’t have to use regular hair dye to dye your tips, you can in fact dye them with Kool-Aid! And if you want your tips to be red just mix the purple packages with a blue package. Leave in the Kool-Aide overnight, and await your result in the morning. It is easy as that. The nice thing about the Kool-Adie dye is that you can create your own color!
 
Streaks/ High lights: Okay if you don’t like the idea of dying the tips, why don't you try some streaks or high lights? Some red high lights on black hair would look nice, or copper high lights on dark brown hair. The truth it, that high lights and streaks are always in, and these colors are a hit all year long. Another thing you may want to do is have a few streaks of purple, or red, blue, whatever color you may decide. I know someone who had three colors in her hair, blond, black, and purple. She only has one streak of purple on the side, and it really leaves a statement.
 
      Alright ladies, there you have some ideas of modern hair dyes. Don't be afraid to try new things, just go for them. And once again remember to buy hair products that will benefit your hair after you dye it because dyes can be damaging. I'll leave you with these thoughts, until next time. 


Photo Citation: Fashionxaddiction.Amazing Light/ Pastel colours.Buzznet. 10 August 2012.23 August 2013


Thursday, August 22, 2013

Hello Perfect Sunglasses

Have you ever seen a perfect compliment between face and sunglasses? It's like a match made in heaven. Some people can intuitively select the best sunglasses for their face shape; however, for the rest of us, we need a little help. While there is no exact science, there are some helpful hints to finding the best shape to compliment your face. 


Square
If you have an angular face with a strong jaw, a broad forehead, a square chin, and the length of your face is proportional to the width, consider trying an oval or round frame that will balance and compliment your features. Opposites attract right? You can also try butterfly shaped or where the frame connects at the top (rather than the middle). 


Do avoid sunglasses that are too geometric or square that will end up accentuating the angles of your face. 


Oval
If you have a face that is balanced and proportional, where the chin is slightly more narrow than your forehead and the cheekbones are high, consider trying square, rectangular or any geometric shaped sunglasses. The great thing about oval faces is that most frame shapes compliment your face! You're a winner :)

Do avoid sunglasses that are too large. Because oval faces consist of a chin that is more narrow than the rest of the face, large sunglasses will dwarf the predominant area of the face.


Oblong
Is your face longer than it is wide? Do you have high cheekbones, a long nose and a tall forehead? Consider tall frames that will help balance the length of your face. 


Opt out of small or short frames that will elongate your features.


Round
Do you have those beautiful, full cheeks, round chin, and proportional width and length? Try angular or geometric sunglasses that will help sharpen your facial features. 


Avoid small or short frames.


Diamond
Are dramatic, high cheekbones a part of your facial feature? Does the shape of your face narrow at the eye line and chin and you have a smaller forehead? The cat eye, upswept sunglasses are best for you! Oval frames are also excellent for balancing your face shape. Or, opt for a rimless sunglass that will bring attention to those beautiful cheekbones of yours.


Do not wear narrow frames that will bring attention to the narrowing of your eye line.


Heart
Do you have a broad forehead and wide cheeks but find that your face narrows at the chin? Try bottom-heavy frames or styles that are set low at the temples. Or, try frames that are narrow and round to help soften your features.


Avoid frames that are too top-heavy that will bring attention upward or frames that are too decorative at the temples. 


Triangle
Is your forehead more narrow and widens out to your cheeks and chin? Try semi-rimless or top-heavy styles that will help balance your features. 


Do not wear frames that are narrow or that are low-set at the temples.  

Monday, August 19, 2013

Road Trip Ready


     Hi ladies, I hope you all took full advantage of the weekend and got to do everything you wanted to. In today's blog I would like to talk about road trips and how one should prepare. Roads trips are fun and adventurous, one can explore the city and tour around. However being in a car for long periods of time can get uncomfortable, so it’s best to wear proper gear. Anyways, here are some ideas on how to prepare for a trip on the road.
 
Planning Your Stop
: Okay friends, when traveling on the road there are always stops to be made for buying food, using the restroom, and taking pictures; these stops are always a must. However that is not what I mean by planning your stop. What I mean is if the trip is over 24 hours long, it is best to spend the night somewhere. Everyone who is the car with you can pitch in for a room. Spending the night somewhere will reassure that everyone feels re-energized the next day, especially the driver. You always want the driver to be well rested.
 
Comfort: When planning on sitting in a car for long hours, it's always best to wear comfortable gear. I'm talking about sweats, beaters or tee-shirts, and comfortable shoes. I don't wear sweats unless I'm at home, but believe me when I say that comfort is ideal on a road trip. Another thing I suggest taking is a neck pillow, they will help prevent kinks if you fall asleep. And take it from me kinks are the worse when you're stuck in a car.
 
Toiletries: Alright, when on the road everyone loves stopping for food, I mean who doesn't love to eat, right? My point is it's always necessary to have your toiletries packed in small bag you can easily access, that way when you guys make another stop everyone can get off and brush their teeth. Because let’s be honest, no one want to have onion breath when you're stuck in a car with lots of people. Another good thing to keep around is wet towels, just in case you make a spill or simply to clean your hands. 
 
Other Things to keep in Hand: It's always good to keep a spare change of clothing just in case. However three things you always want to have by your side are a paper map, your wallet, and a camera! Don't get me wrong a GPS comes in handy but sometimes it's not 100% with directions. A camera on the other hand is always great to have. There are beautiful places to be discovered on the road, so it's always nice to capture the scenery.
 
     Alright, there you have it ladies. I hope you all consider these tips and if you're planning a road trip anytime soon, have a safe trip, and take lots pictures. Have a lovely Monday. 


Photo Citation:Fun Road Trips in the West.californiatravelguide. 17 July 2012. 19 August 2013 

Saturday, August 17, 2013

What Different Kinds of Curling Irons Provide For Your Style


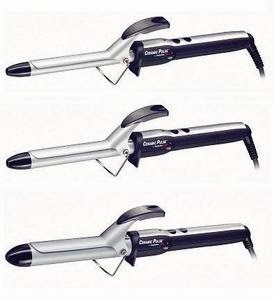
Gone are the days when curling irons only form a spiral. Now, there are curling irons that perform all kinds of styles. Some provide tight curls, others give off a spiral, some provide loose waves, and others give off a crimp look. The unfortunate thing is that there isn't one kind of curling iron that provides all of those looks. You have to opt for different styles of curling irons to fill your hairstyle needs. Although you do have to have a variety of hair curling irons, it is totally worth the style. Let's see what each different style of curling irons can provide for your hairstyle looks.

The Double Barrel
These kinds of hair curling irons were initially only used by professional hair stylists. However, over the years the public has been given access to such products so that we can achieve the same style on our own. The double barrel curling iron is specifically for creating waves, but they do provide variety. You can get dramatic waves to tight curls and everything in between. The only trick is that these are more difficult to use than the standard curling iron that you're used to, since there are two barrels.

The Hour Glass Curling Iron
These curling wands have a barrel that resembles an hour glass - Hence the name. These curling irons can achieve the most stunning, sultry "just got out of bed" hairstyle that makes you look like the desirable diva that you are. You can get tons of volume, or steer clear from the roots and enjoy a more relaxed look.

The Textured Barrel Curling Iron
Textured barrels on curling irons allow your hair to grip onto the barrel ore tightly which provides stunning twists, curls and waves, all in one. The look that is full of texture can be extremely hard to achieve when you're using 5 different curling irons. However, with one textured barrel, you could definitely pull it off flawlessly.

The Standard Curling Iron
You likely have a couple of these hidden in underneath your bathroom countertops. The standard curling iron can either come with a clip but most are typically clipless now-a-days and go by the name of "curling wand". These styles of curling irons come in a variety of shapes and sizes and each have their own specific kind of curl that it provides. The typical curling irons can give you tight curls, spirals, waves, and curls depending on the size of the barrel that you use.

Curling irons do not have to be complicated. You just have to know how to use them, and which style of curling iron provides the look that you are trying to achieve. Explore the options. You should definitely have different kinds of curling irons within your haircare wardrobe so you hairstyle can always be provided with a new hairdo.

Photo Credit; http://4hair-treatment.blogspot.ca/2009/04/hairstyles-tips-curling-iron-basic-tips.html

Friday, August 16, 2013

Gearing up for Fall

      
Download photo.JPG (155.8 KB)


        Hello ladies , I hope you all had a good start and finish to your week. For today's blog I would like to discuss items that you can wear in the fall  because as many of you know when the season changes so does the clothing. And we all  must be properly and fashionably equipped.  So today I want to share with you guys some items that are always a hit.

Rain Boots: How about it, who would of thought that rain boots can actually be stylish? Believe it or not, they really can. Children tend to wear colourful rain boots, but that doesn't mean we have to wear them.  In fact, there are some really fashionable looking rain boots, you wouldn't even be able to tell that they are meant for the rain. They look more like riding boots.

Leather Jacket: Leather jackets are always in. They are very stylish and you can rock them with anything. I personally love wearing a leather jacket with colour pants; it gives the overall look more pow. You can never go wrong with these jackets, they are absolutely perfect for the fall.

Beanies/ Berets: Alright, wearing beanies during the months of rain and winter  is super convenient. Not only do they keep you cozy, but if you're having a bad hair day, they can sure help you hide it! Berets are super fashionable too, you can wear them with pretty much anything. They also make you look very chic.


Scarfs: What better way to style than with a scarf? Not only do they provide your neck with warmth but they make for a great accessory. Infinity scarfs are the best, and they work really well with nice fitted shirts. Scarfs however are not only meant for your neck, you may in fact wear them as belts or as head bands ( regular scarfs of course). Just try it and play around with them.

Gloves: A lot of times during the fall it gets cold enough to wear gloves. Having gloves can also help you compliment your outfit. Here is an example of a possible outfit, leather jacket,  red beanie, and red gloves; a cute and simple outfit for the fall.

         Okay, that is all the tips I have you ladies today. I hope you all get to enjoy your weekend and get lots of rest; until next time. 


Photo credit: darkblue-darkblue. tumblr. 16 July 2013

Thursday, August 15, 2013

Up In Knots: Fashionably Knotty Hip Tip Week 2

Snazz up your current outfit with a simple and inexpensive accessory: a scarf! Last week, we covered how to tie knotty scarves around the waist to accent your different outfits. This week, we are covering your not so basic scarf techniques for the neck. 


Wrapping a scarf around your neck a few times is so boring! Yawn.... Here are some easy but very cute ways to tie scarves that'll make you look chic and stylish:


Bow Me Up


For this technique, you will need a long scarf, preferably a scarf with natural texture. Let the middle of the scarf rest at the back of your neck and letting the ends hang evenly on your torso. Simply tie the two ends as you would a bow. Puff the bows to make the full and let the rest of the scarf dangle.


Chic and Sophisticated


This is the perfect accent to any business outfit or to soften an edgy outfit. For this technique, you will need a medium to long scarf that preferably is two-tone or multi-tone. Place the middle of the scarf at your throat, allowing the length of the scarf to hang down your back. Wrap the scarf around your neck to achieve desired hang down length on the front. Loosen scarf around your neck and poof out. Tie the ends together and tuck knot under the loop around your neck.


Sweet Sweet Flower


Select a multi-hued scarf or a solid but bright hued scarf for this design. Let the middle of the scarf rest at the back of your neck, with the ends dangling in the front. Bring the ends together and position to either side of the neck. Begin twisting. When the scarf becomes tight, begin wrapping the ends in a circular motion, using your finger to guide the shape into a bun. When the ends are at your neck, tuck the ends into the loop around your neck.
The key here is that the scarf is tight when you twist it. Once twisted, it should hold its shape. Tucking the ends in will help keep it in place. Still feeling loose? Use a pin to secure in place.


Again, to be fashionable does not mean you have to buy whole new outfits. It is about knowing what you have, creating different combinations to create new outfits, and adding the right accessories to make them fashionable.

Be smart, be savvy, be a fashionista!

Monday, August 12, 2013

Taking on a Challenge


 how-to-solve-7-challenges-of-employee-driven-innovation


         Hello ladies, I hope you all got to rest during this past weekend. In today's blog I want encourage you all to take a challenge at something. It can be anything; losing weight, saving money, or challenging a class. Like I said, it can be anything, just go out of your way, and challenge yourself with a task. Now let's see how to go about a game plan.

Things to Consider before the Challenge

 -The What: What are you challenging yourself with and what do you want to gain out of it?

-The why? Why is this challenge important?

-The when: When are you going to go about taking this challenge, and how long will it take? Set a time limit for yourself, and stay within it.

Visualization: After you have asked yourself all the right questions, it's time to visualize on how you plan to achieve this goal. Write it out or make a vision board. Make sure you look at them every now and then so you remind yourself what it is that you’re trying to accomplish.

 In the Process: Okay, when we begin a challenge, we think, “yeah, I'm ready to do this." And most often than not, when we're actually going about our challenge, we struggle and struggle and then begin to doubt and question if all the sacrifices being done are worth it? What to do then?

 -Breathe: Take a break, relax your thoughts and reflect on the situation. When you're trying to accomplish something it's never going to be easy. And as most of you know, everything in life is earned; therefore whatever you're challenging yourself with is no different. It takes a lot of commitment and bravery to achieve a goal. So, if you feel like you're struggling, take a step back, reflect, and see on what can be done to improve?

 -Don't Quit: Whatever you do, don't give up; you'll surprise yourself with what you can do. Keep focus on the ultimate goal, there will be struggles along the way, but at the end of the day, every struggle and sacrifice will be worth it, I promise. There is no better feeling than succeeding in a task.

     Okay friends, that concludes today's blog article. I hope you all have a great work week, until next time.

Photo Citation: Müller-Krogstrup Jesper. How to solve 7 Challenges in Employee Driven Innovation
                                innovationmanagement. 12 August 2013